Setup Wizard
The Setup Wizard runs on first boot and turns a fresh LiMon install into a working monitoring appliance. Docker installs normally open through the URL printed by the installer. Package installs normally use http://<host>:8585/setup/.
Each step validates the information it owns before moving on. The wizard creates the initial bootstrap configuration, generates credentials, and stores runtime settings so day-to-day changes can be managed later from the Admin UI.
1. Welcome
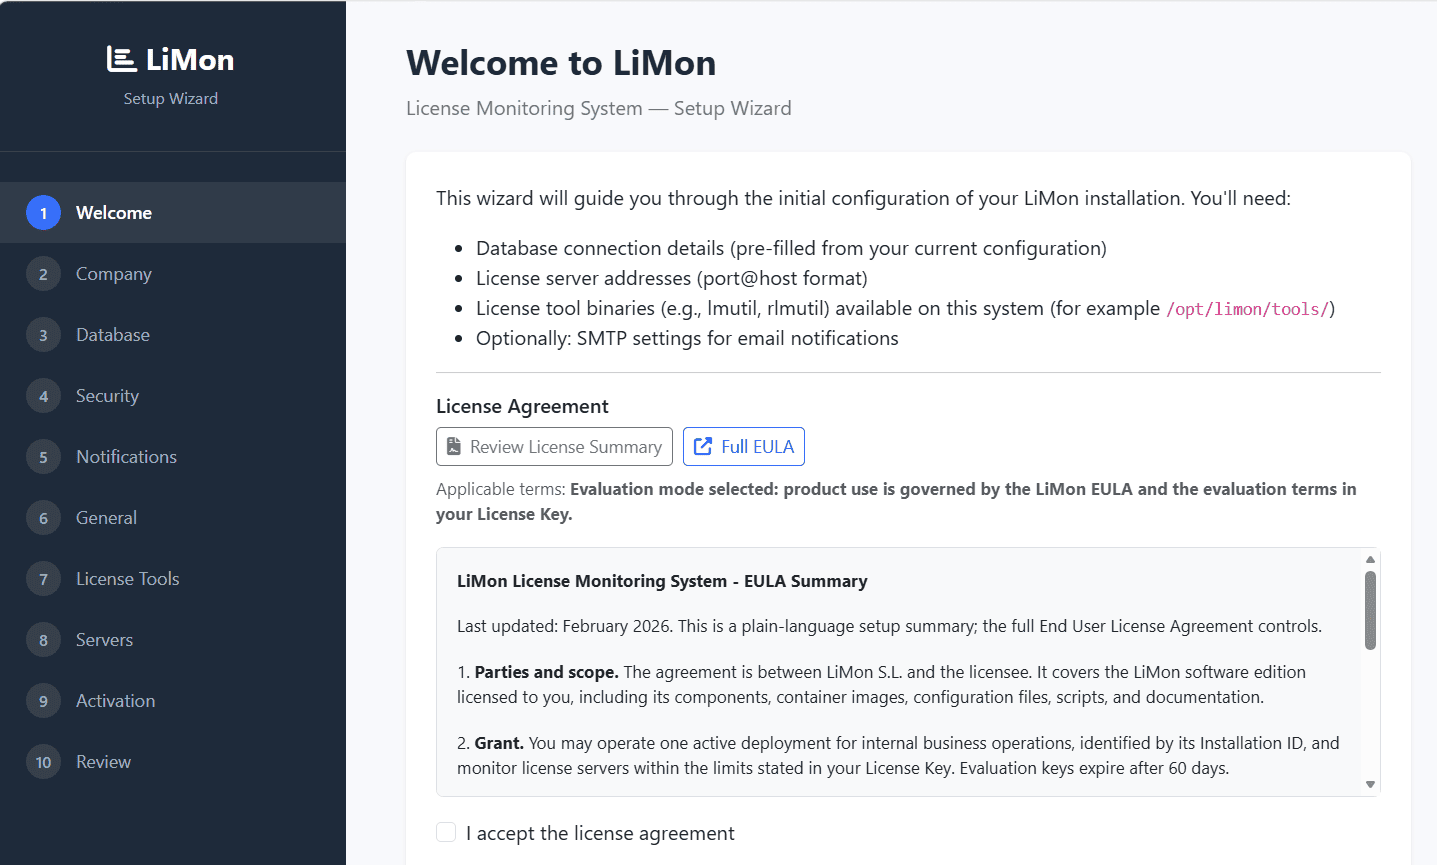
Use this screen to confirm that the instance is still in first-run mode and that you are ready to initialize it. The wizard also links to the license summary and full EULA if you want to read them before continuing.
2. Company
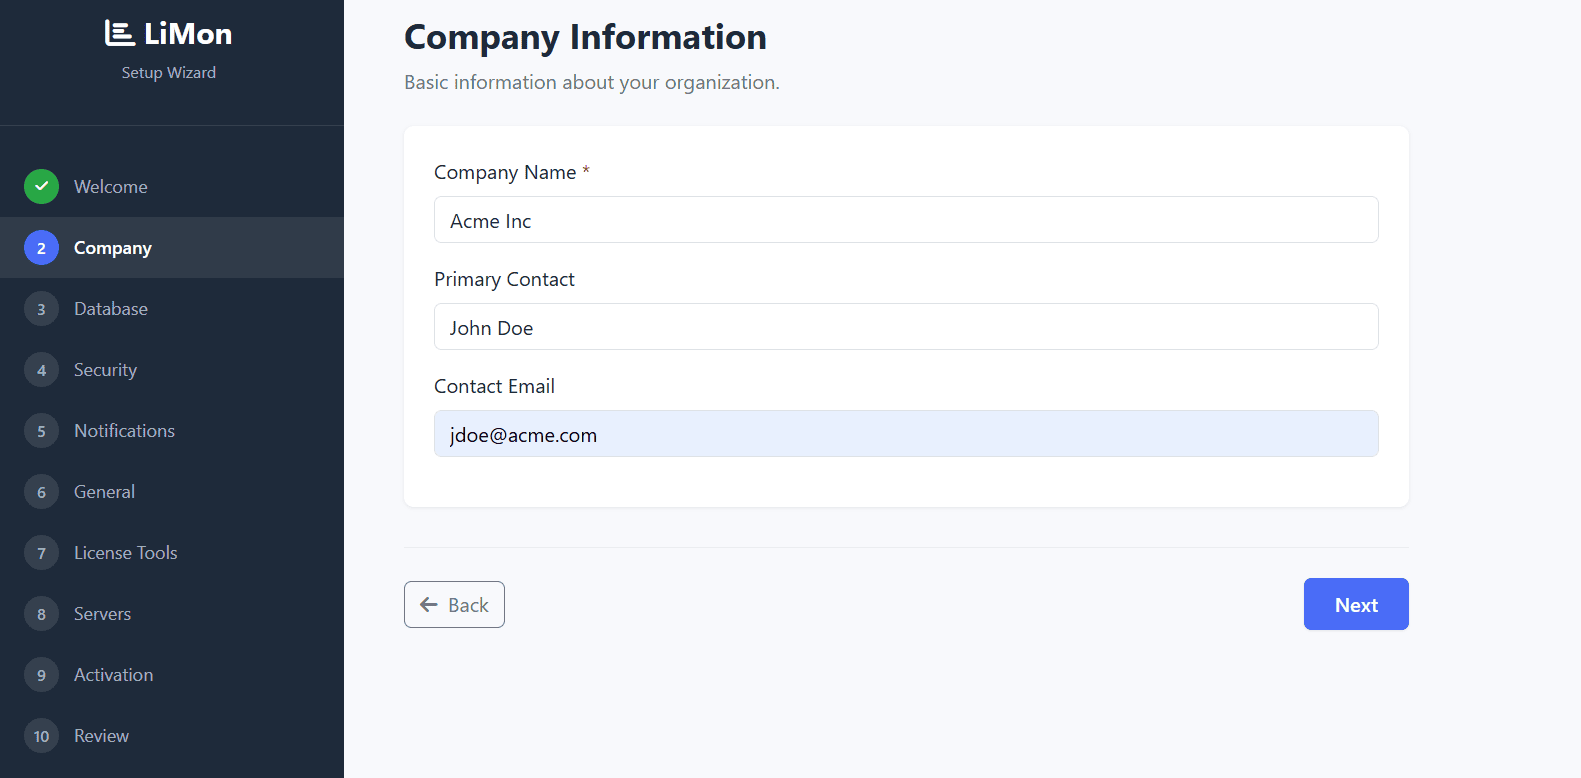
Enter the organization name, primary contact, and contact email for this installation. These values can be corrected later from the Admin UI if ownership changes.
3. Database
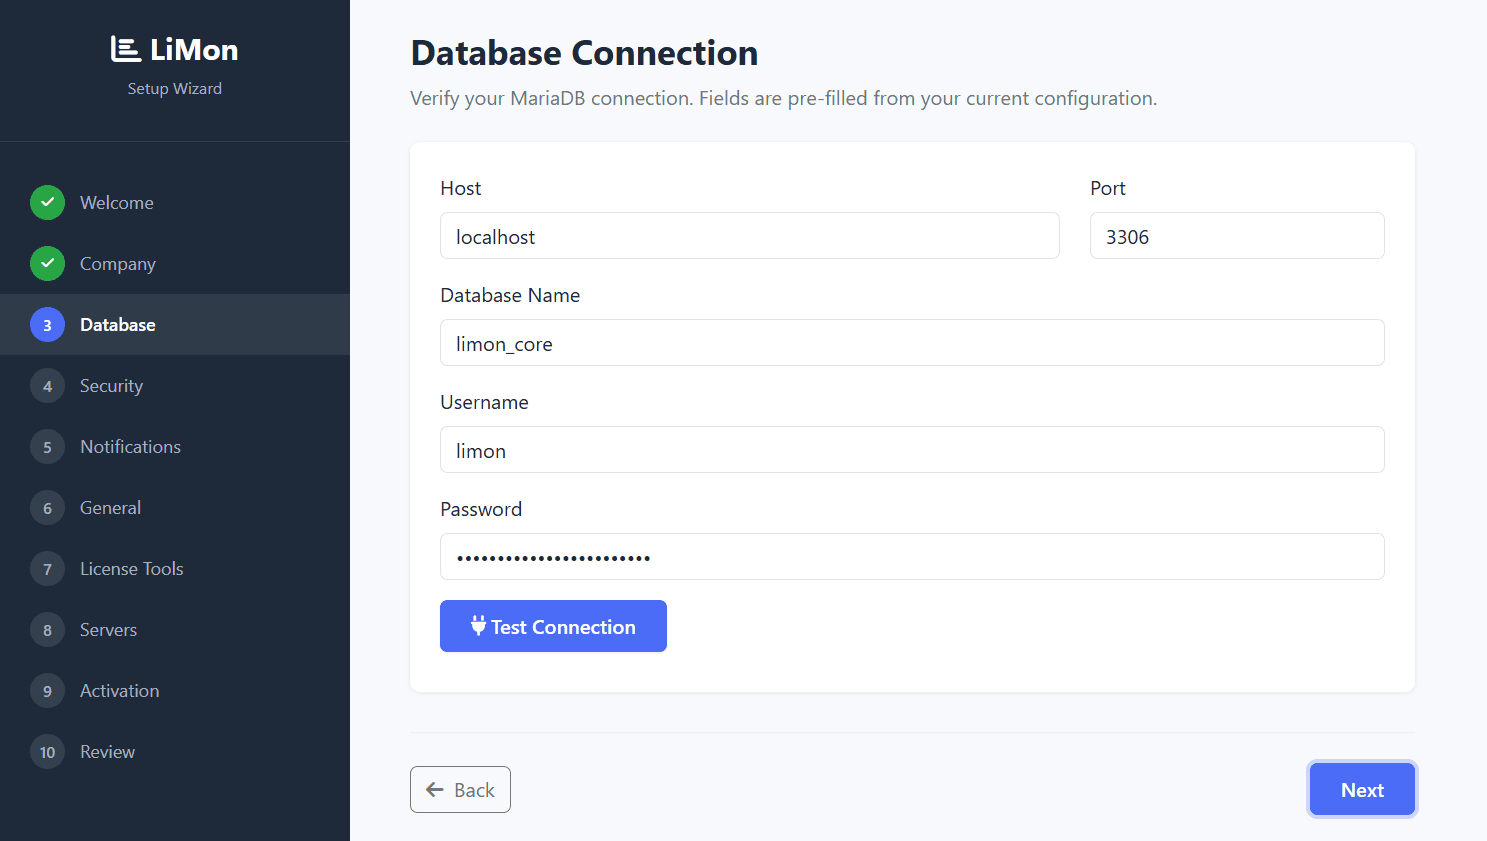
LiMon uses MariaDB (or MySQL) for runtime state, configuration, and license monitoring data. Test the connection here so later steps do not fail to write the configuration against an unavailable database.
4. Security
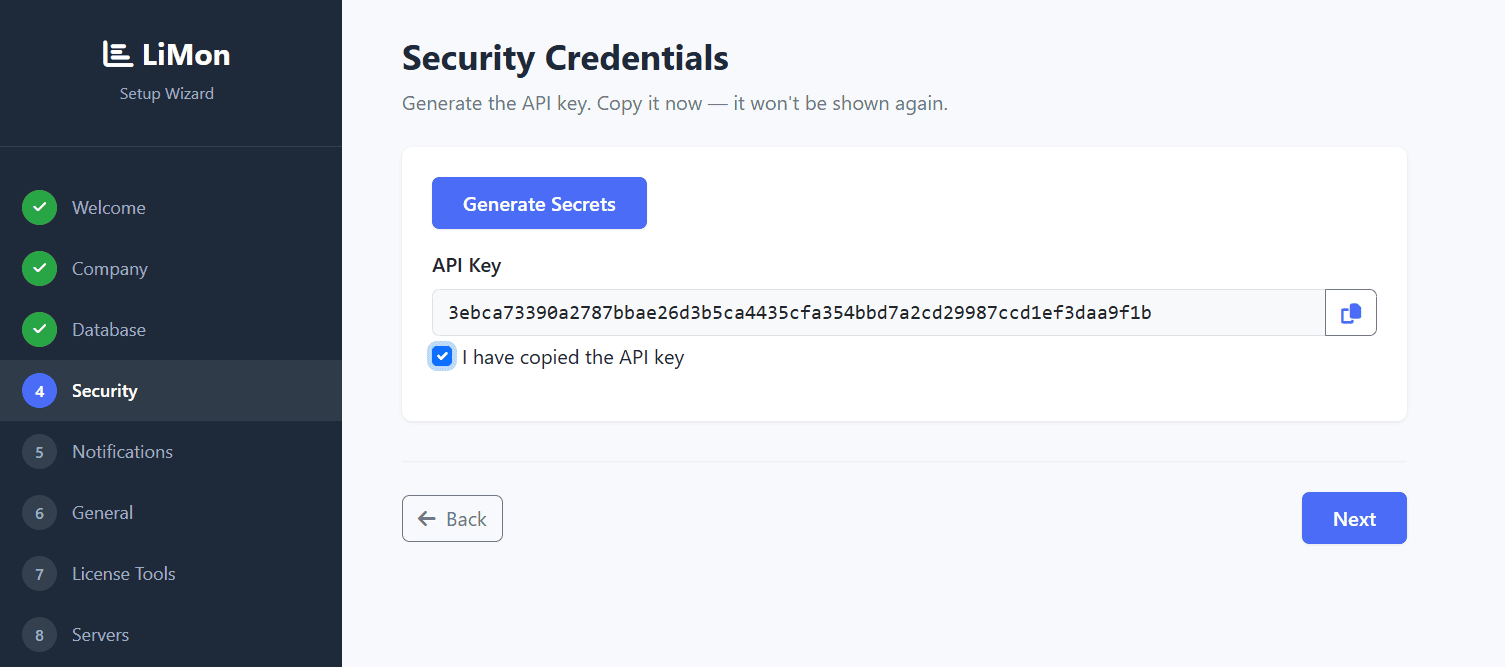
Copy the generated API key when it is shown; the wizard warns that it will not be displayed again. This key is used for Admin UI and protected API access, and can be rotated later.
5. Notifications
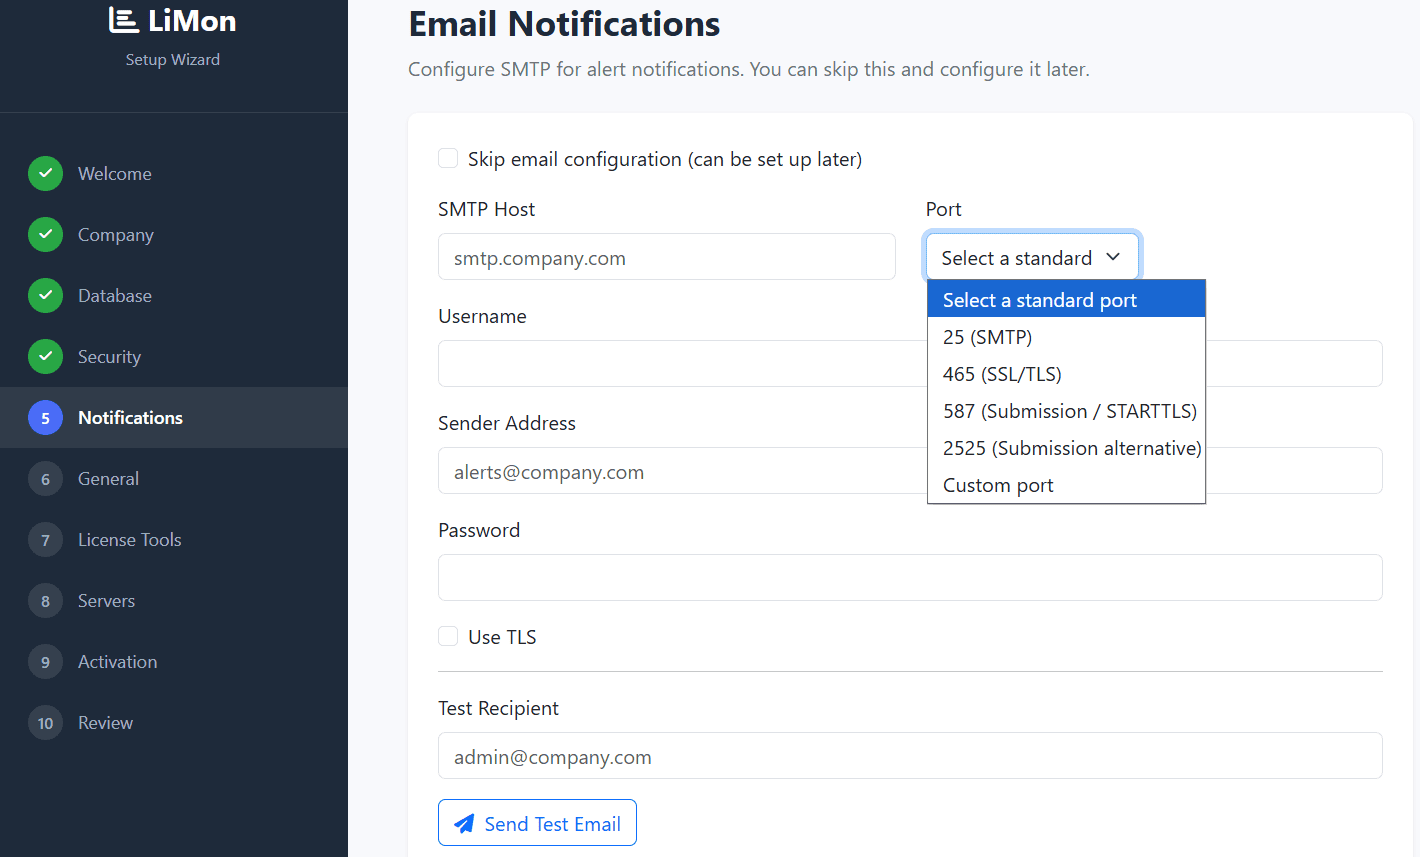
SMTP is optional during setup. If configured SMTP Host, Port and Sender Address are mandatory. Or skip the step and add mail settings later from the Admin UI.
6. Monitoring
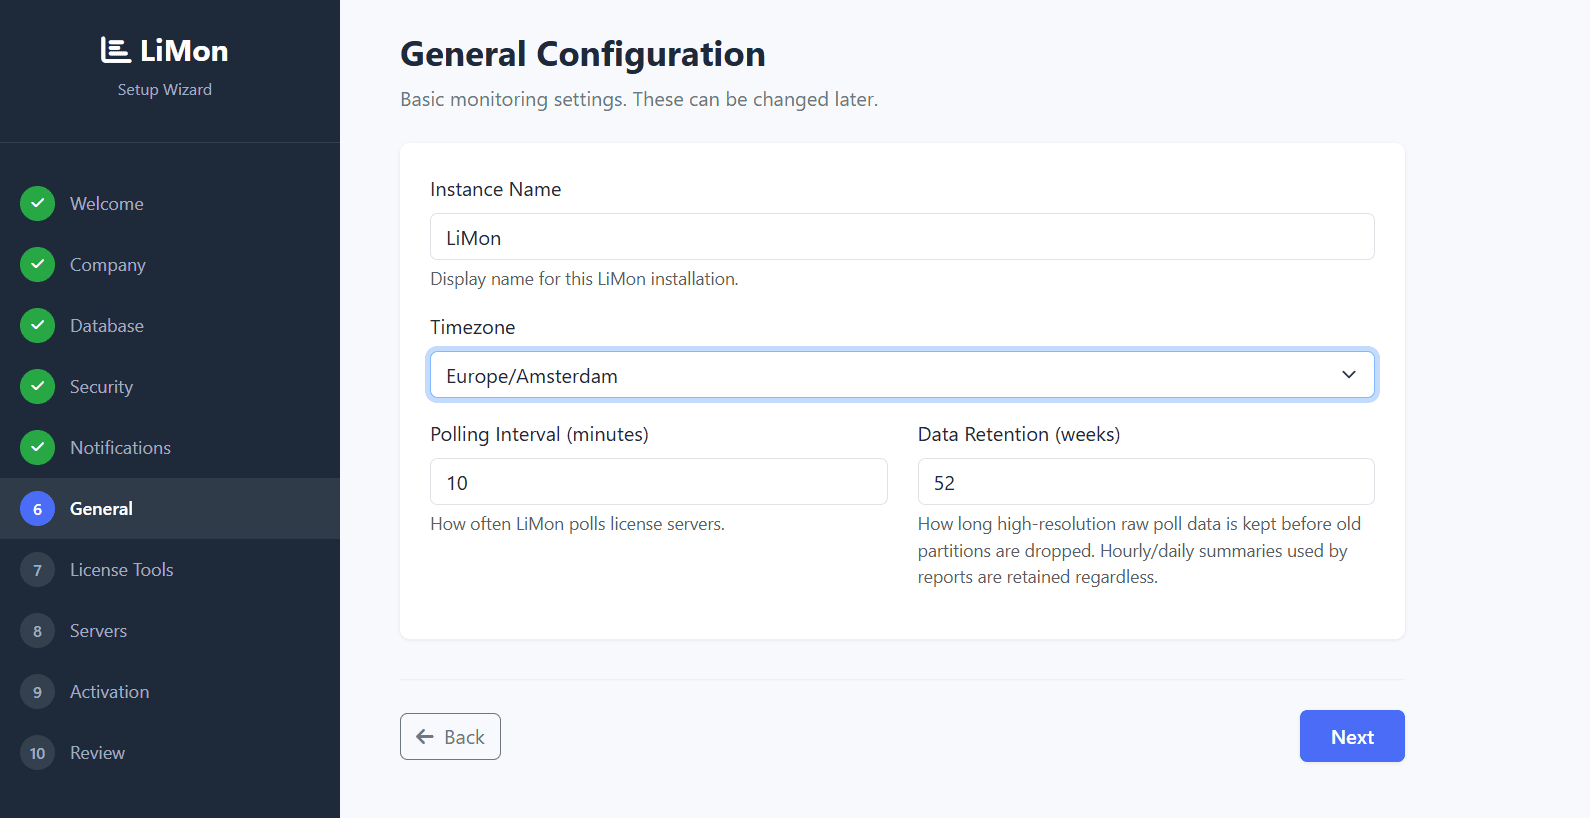
These defaults guide monitor cadence, timestamps, and how long raw polling data is kept before consolidation. Routine changes later land in the database and are picked up automatically. Make sure to set here the timezone that matches the server running LiMon.
7. License Tools
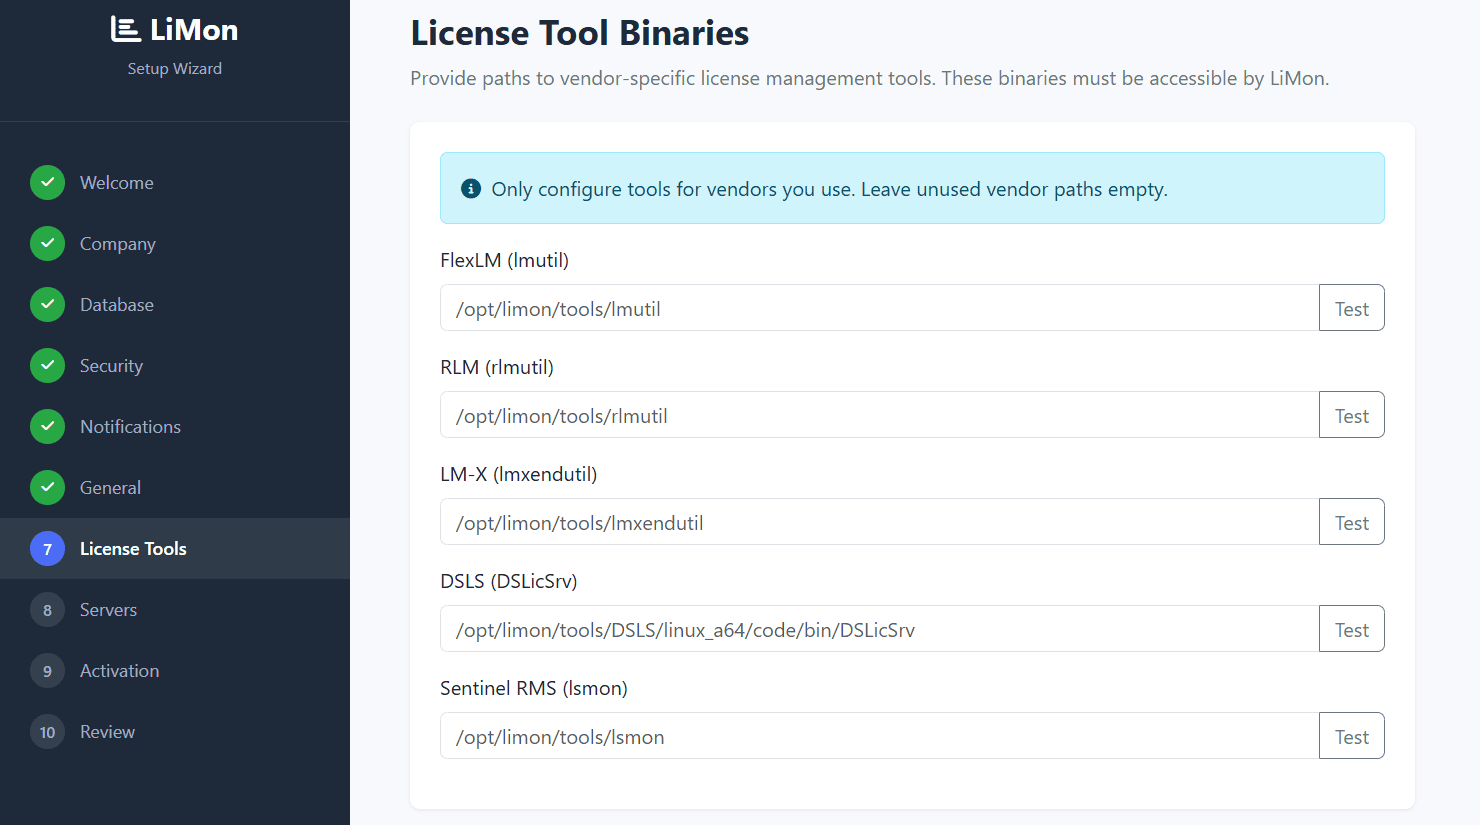
Only configure the vendor tools you have on the system. Leave unused paths empty and add more tools later from the Admin UI as the monitored estate grows. You can test the tools and LiMon will verify if they are valid linux binaries and executable.
8. Servers
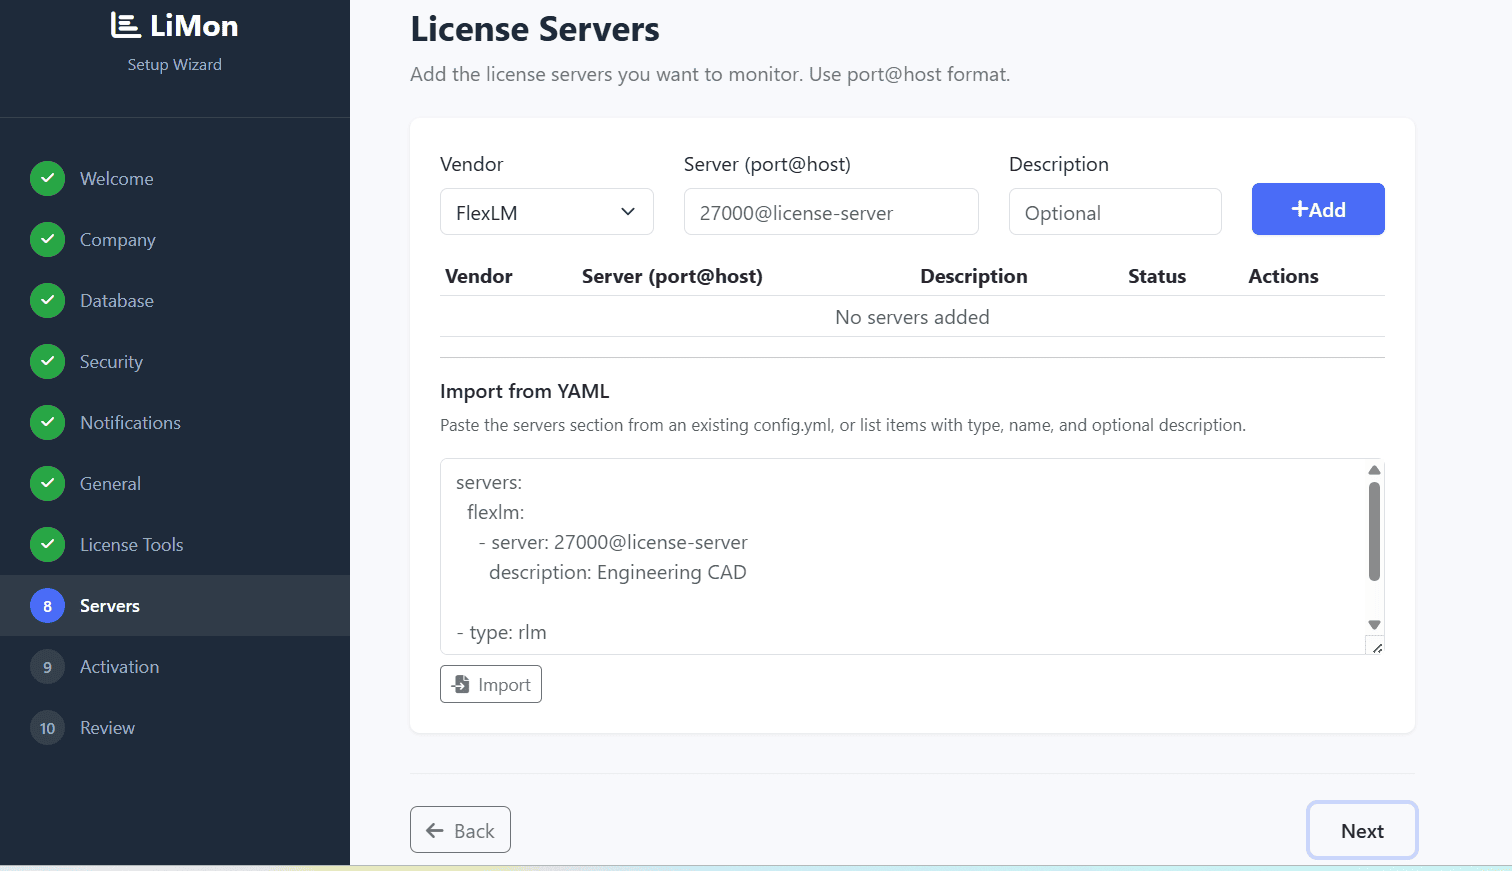
Add the first license endpoints that LiMon should poll. The wizard can start from a small set; additional servers can be imported, edited, decommissioned, or reactivated later.
9. Activation
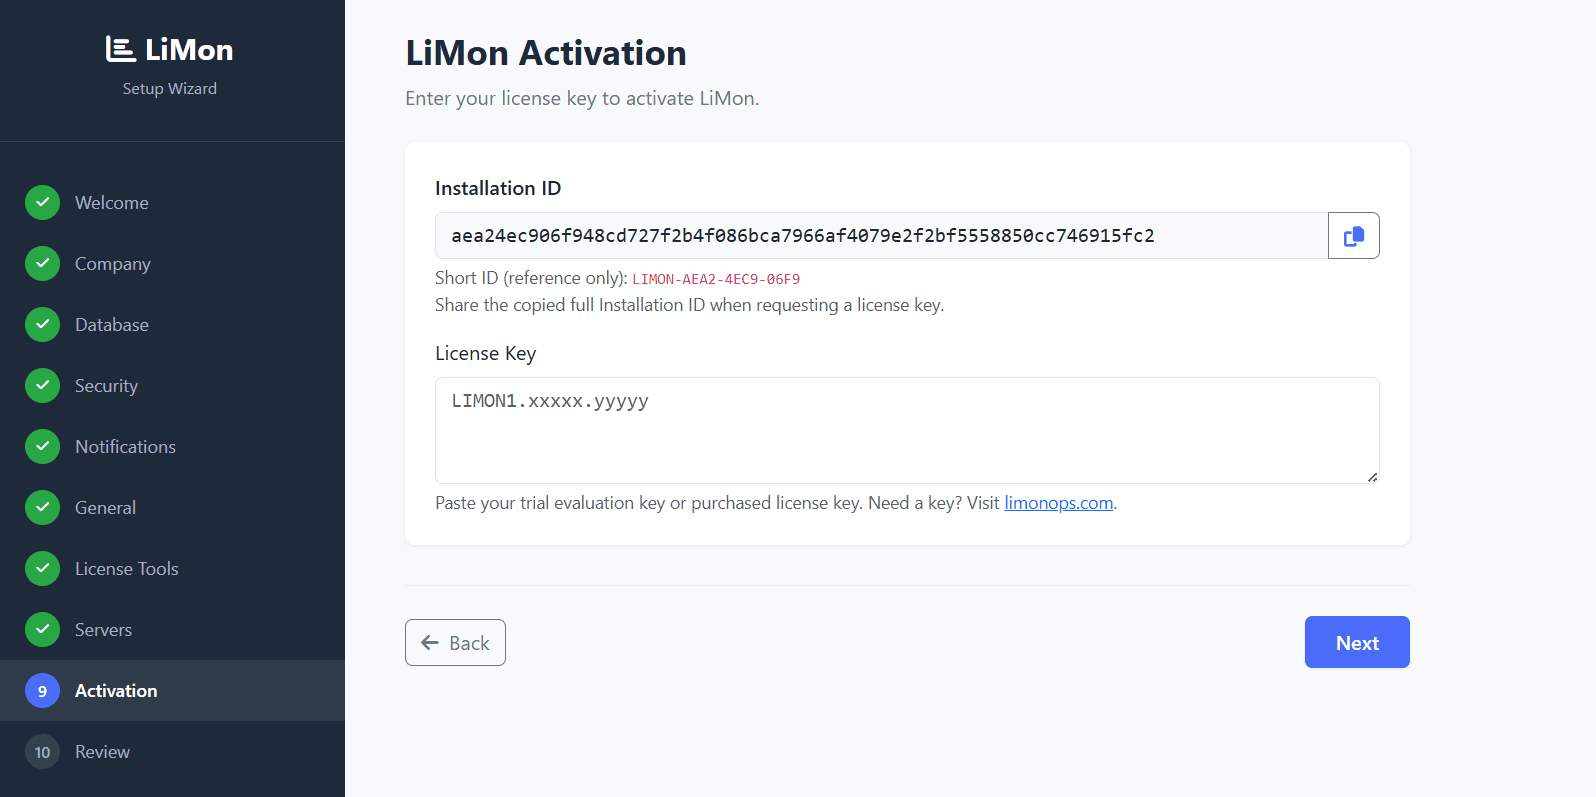
This is the place where you enter your evaluation key or the permanent key if you have one. For both an evaluation and a purchase, copy the installation ID shown here and head to the license portal: paste the installation ID and the portal generates a key bound to this installation. Paste that key back into the wizard. (Your key is also emailed to you as a backup.) Activation determines the platform tier, server limits, and subscription-gated capabilities.
10. Review And Finalize
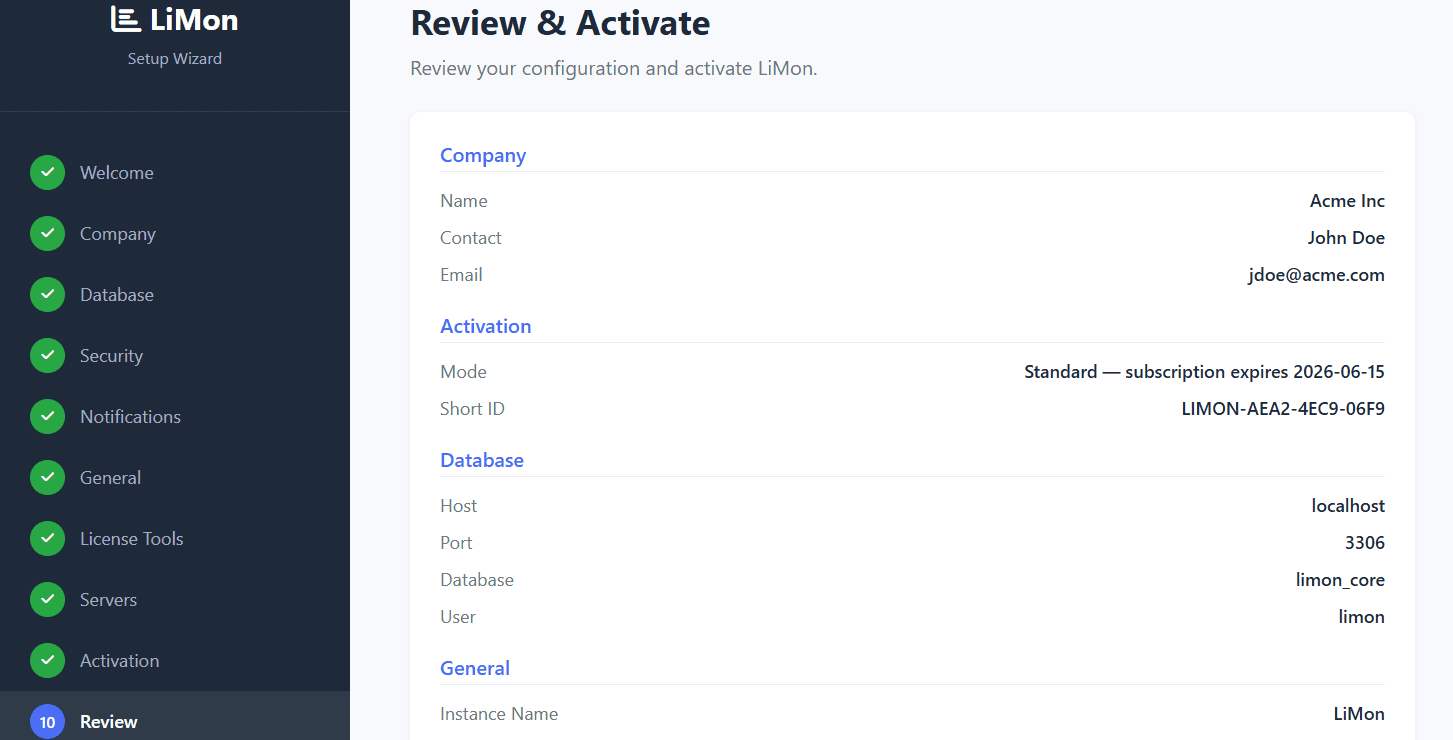
Review the collected settings before committing them. If the current configuration exceeds licensed limits, the wizard blocks finalization until the setup is corrected or the license is upgraded.

When you are good to go Activate the instance to write the configuration and restart LiMon with the new settings. After finalization, use the Admin UI for routine changes and the Frontend for monitoring and insights.
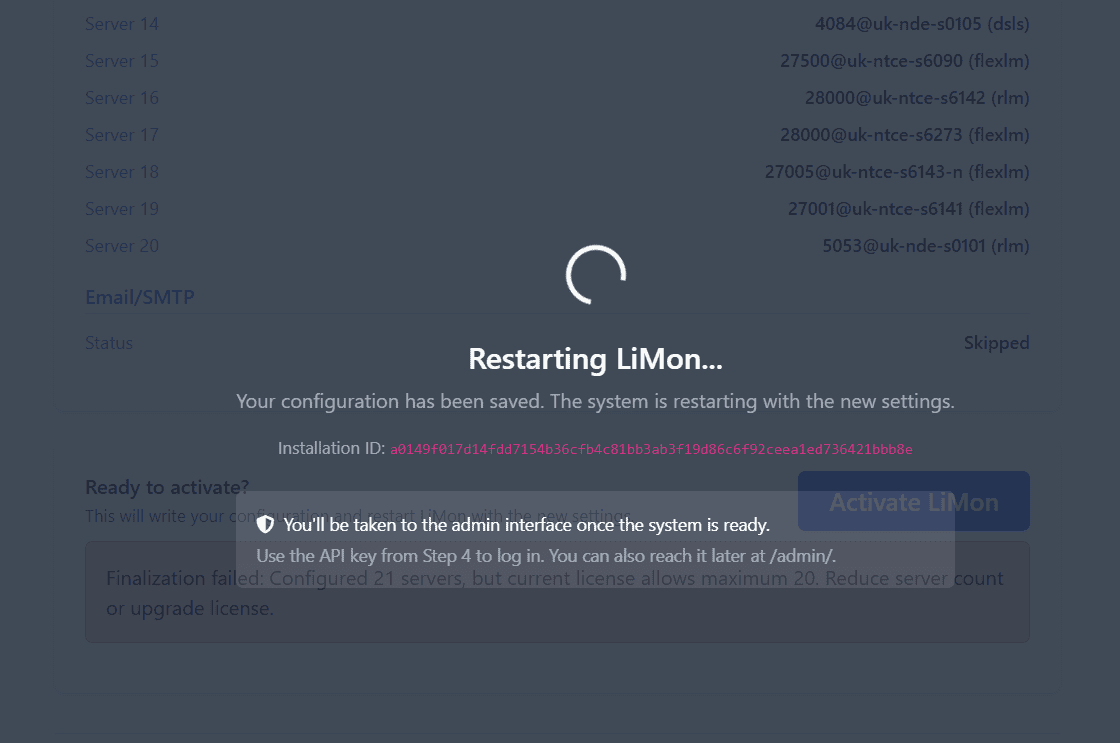
Once the restart finishes you'll be redirected to the admin interface login page. Set the API URL and use the API key generated in Step 4.
Tip
You do not need every vendor binary or every license server on day one. Add the minimum needed to begin polling, then refine servers, applications, sites, and settings from the Admin UI.